Hi, loves!
Yesterday I posted on my Instagram account and also on my Facebook page a photo from a year ago where I showed you how I contoured and highlighted then. Today I decided to do an updated 'contour & highlight' routine to show you how I do it today. First of all, I want to say that I DO NOT DO THIS EVERYDAY! I'd rather sleep another half an hour than to contour like crazy every morning. My daily routine is actually very basic, but I'll show you that another time. Also, this is not my full face glam-routine, as I skipped some steps because I wanted to focus on the technique in question today. For a full face I would do a little color correcting at first, and then what you'll see next. I only do my full face routine when I go to an event, a wedding, or if I go out one night and I want my face to look flawless.
As for products, I use both cream (Fraulein38 concealer palette) and powder (Sleek Face Form - Fair -, Sleek Contour Face Kit - Medium -), NYX HD Studio Photogenic Loose Powder) products. This is just my way of doing it, it doesn't necessarily mean that it is the right way. Do what works best for you, I'm just here to inspire you. Now let's get into it!
I start with a bit of foundation, just to even out my skin. Notice how my face looks flat in this photo, no definition and no structure.
Then I go on with my cream products. I firstly apply the darker shade just below my cheekbones, one the sides of my forehead and just a bit at my hairline, at the sides of my nose and on my jawline. Then I go on with the lighter shade and I create an inverted triangle in my dark circles area. next I apply the same shade on my forehead, on the center of my nose, on my cupid's bow, chin, and also below the point where I've already traced my checkbone line. Also, you should not go too dark or too light with the contour/highlight (mainly if you're a beginner) because it will not blend as well and your face will look dirty rather than radiant. Now, I suggest you study your face closly in the mirror in natural light and see where the light hits your face and where it creates shadows. That's where you should mainly apply the products (light - highlight, shadow - contour). At least that's what I did. Once again, I am not a professional so I can only speak from my own experience.
Next step: blend, blend, blend!! I like to blend this with a makeup sponge, it gives a really nice finish and, I don't know, I'm just used to doing so. This is how my face looks after I've blended the products in.
Now's the time to use my powder products. I like to bake where I put my highlighter, and I'll just set my contour with some contouring powder. I normally use a lighter shade of contouring powder to set the cream product all over where applied, and then I'll go back just on my cheeckbones with a darker shade, to intensify the effect.
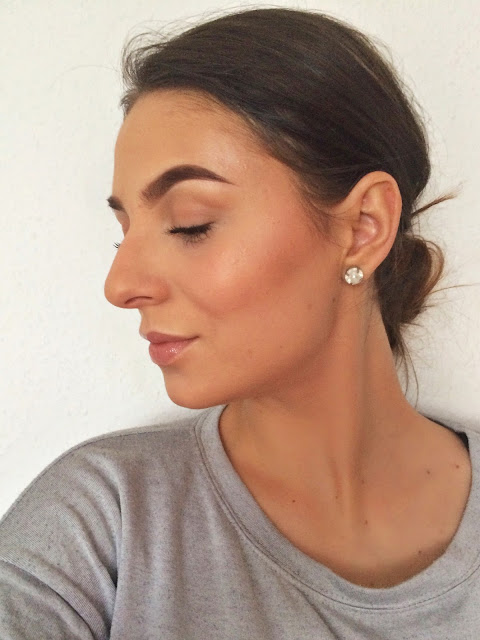
Are you ready for the final result? I also put my eyebrows on (brows are life!), a bit of mascara, blush, highlighter and a hint of lipgloss, to show you a more of a put-together look. I hope you like the result!
So, my darlings, this is how I highlight and contour when I have to go somewhere special and I want a bit of a structured face. I don't have proeminent cheeckbones so I kinda have to 'fake' them somehow. Well, I hope you enjoyed this tutorial and I'll see you guys soon! Until next time! Love, xoxo
____________________________________________________________
CONTACT ME AT: makeupbymademoiselle@gmail.com


0 comments :
Post a Comment
Tell me what's on your mind.